The Honda CR-V, renowned for its reliability and efficiency, occasionally presents its drivers with a dashboard lit up like a Christmas tree.
While this might initially be alarming, understanding the root causes and potential solutions can alleviate concerns.
This comprehensive guide delves into the intricacies of the Honda CR-V’s dashboard warning lights, ensuring you’re well-equipped to handle any situation.
Advertising links are marked with *. We receive a small commission on sales, nothing changes for you.
Key Takeaways
- Dashboard warning lights in Honda CR-V signal potential vehicle issues.
- Common causes include electrical malfunctions, sensor glitches, and wiring issues.
- Regular maintenance can prevent many dashboard light problems.
- Immediate action is crucial when multiple warning lights illuminate.
- Professional diagnosis is advised if self-troubleshooting doesn’t resolve the issue.
The Importance of Dashboard Warning Lights
Every vehicle, especially sophisticated models like the Honda CR-V, has an array of warning lights on its dashboard.
These lights serve as the car’s way of communicating potential issues, ranging from minor alerts to urgent warnings.
Ignoring these lights can lead to more significant problems, potentially resulting in costly repairs or compromising safety.
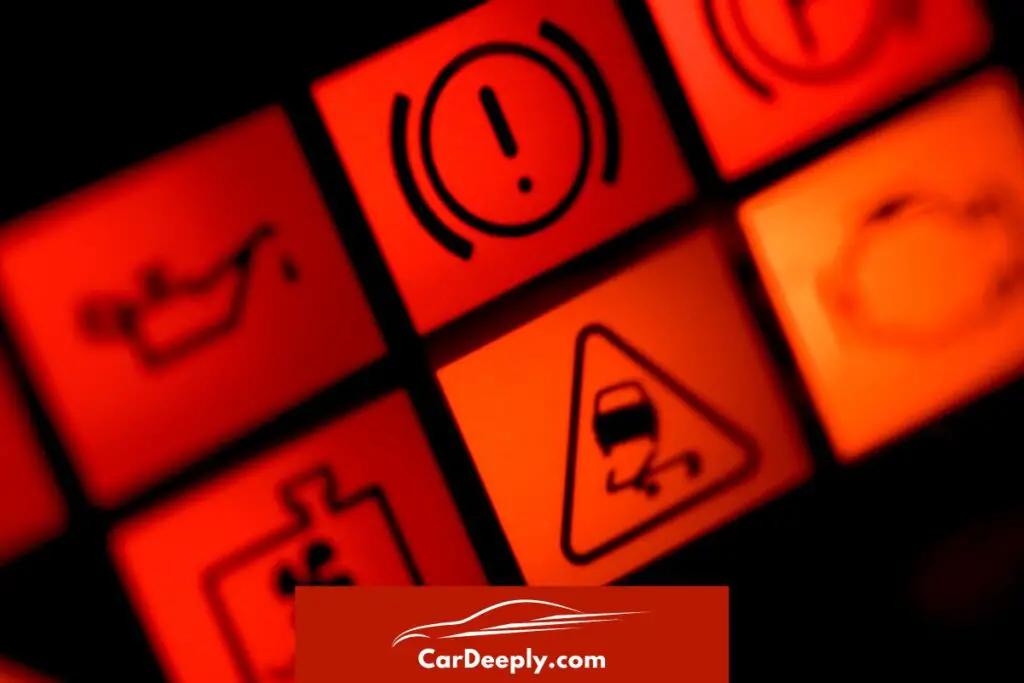
Decoding the Honda CR-V Dashboard Lights
Before diving into the reasons behind a fully illuminated dashboard, it’s crucial to understand the individual lights and their meanings:
- Check Engine Light (CEL): Indicates potential engine or emission system issues. This could be from a loose gas cap to a malfunctioning oxygen sensor.
- Battery/Lading System Light: Signals problems with the battery or the charging system. This might be due to a dying battery or a malfunctioning alternator.
- Brake System Light: This light warns of potential issues with the brake system. It could be due to low brake fluid, malfunctioning brake pads, or more severe concerns.
- Tire Pressure Monitoring System (TPMS) Light: Alerts the driver when tire pressure is too low or too high, ensuring optimal performance and safety.
- Oil Pressure Light: Indicates low engine oil levels or a malfunctioning oil pump. Regular oil changes and checks can prevent this light from illuminating.
- Airbag Warning Light: Signals a problem with the airbag system. This is crucial for safety and should be addressed immediately.
- Temperature Warning Light: Warns the driver when the engine is overheating. This could be due to low coolant levels or a malfunctioning radiator.
- Service Required Light: A reminder that the vehicle is due for scheduled maintenance. Regular service ensures the longevity and performance of the Honda CR-V.
Why All the Lights? Unraveling the Mystery
Several reasons can cause the simultaneous illumination of all dashboard warning lights:
- Electrical System Malfunction: The most common culprit. This can arise from faulty alternators, weak batteries, or electrical shorts.
- Sensor and Onboard Computer Issues: Modern vehicles, including the Honda CR-V, have sensors and an onboard computer. A glitch in any of these can trigger all warning lights.
- Mechanical Problems: Severe mechanical issues affecting multiple systems simultaneously can cause the lights to come on.
Navigating the Problem: Solutions and Recommendations
The simultaneous illumination of all dashboard warning lights can be a perplexing issue.
Here’s a detailed guide to diagnosing and potentially resolving the problem, broken down into specific areas:
Software Glitch: Rebooting the System
Sometimes, the solution is as simple as rebooting the system.
Here’s how you can do it:
- Turn off the engine and remove the key from the ignition.
- Locate the battery in the engine bay.
- Disconnect the negative terminal of the battery using a wrench.
- Wait for 10-15 minutes to allow the system to reset.
- Reconnect the negative terminal and tighten it securely.
- Start the engine and check if the warning lights have turned off.
Electrical System Check: Battery and Alternator Inspection
A malfunctioning electrical system is often the culprit.
Here’s how to inspect and resolve potential issues:
- Battery Check:
- Locate the battery and inspect the terminals for corrosion or loose connections.
- Clean any corrosion using a wire brush and baking soda-water solution.
- Tighten loose connections using a wrench.
- If you have a multimeter, set it to DC Volts and measure the battery voltage. A healthy battery should read around 12.6 volts when the engine is off.
- Alternator Check:
- Start the engine and measure the voltage at the battery terminals again. A functioning alternator should produce around 13.6 to 14.6 volts.
- If the voltage is outside this range, it might indicate a failing alternator and professional inspection is advised.
Instrument Cluster Check: Fuse Inspection and Replacement
A problem with the instrument cluster can also cause all warning lights to illuminate.
Here’s how to check and replace fuses:
- Refer to the Honda CR-V owner’s manual to locate the fuse box, usually found under the dashboard or in the engine bay.
- Identify the specific fuse related to the instrument cluster or warning light system using the manual.
- Remove the fuse using a fuse puller or carefully with needle-nose pliers.
- Inspect the fuse for any breakage. If broken, replace it with a new one of the same amperage.
- Reinsert the new fuse and check if the issue is resolved.
Wiring and Connections: Thorough Inspection
Loose or damaged wiring can also lead to multiple warning lights appearing.
Here’s how to inspect it:
- Turn off the engine and disconnect the battery for safety.
- Use a flashlight to check the wiring under the dashboard and engine bay.
- Look for visible damage, frayed wires, or loose connections.
- Ensure all connectors are firmly seated and replace any damaged wires if necessary.
- Reconnect the battery and start the engine to check if the problem is resolved.
Professional Diagnosis: When to Seek Help
If the above steps don’t resolve the issue, it’s time to consult a professional.
Here’s what to do:
- Contact your local Honda dealership or a trusted mechanic.
- Please explain the problem in detail, including any steps you’ve taken to resolve it.
- Schedule an appointment for a comprehensive diagnosis.
- Follow the professional’s recommendations for repairs or replacements.
FAQs
What should I do if only one specific warning light remains illuminated?
If a single warning light stays on, it typically indicates a particular issue related to that system or component. Refer to the Honda CR-V owner’s manual for the light’s meaning and seek professional advice if necessary.
How often should I schedule regular maintenance to prevent dashboard light issues?
Following the maintenance schedule provided in the Honda CR-V owner’s manual is recommended. A general check-up every 5,000 to 10,000 miles can prevent many problems.
Are there any tools or apps that can help diagnose the meaning of a warning light?
Yes, OBD2 (Onboard Diagnostics) scanners can read error codes from your vehicle’s computer, providing insights into specific issues. Several apps connect to these scanners and offer detailed explanations.
Can driving conditions, like extreme cold or heat, affect the dashboard warning lights?
Extreme temperatures can impact battery performance, tire pressure, and fluid viscosities, potentially triggering warning lights. Ensuring your vehicle is winterized or prepared for extreme heat is essential to minimize such issues.
Is it safe to drive my Honda CR-V when multiple warning lights are on?
While the vehicle might still operate, having various warning lights on is not recommended. It could indicate severe issues that might compromise safety or lead to more significant damage.
Conclusion
While a fully illuminated dashboard can be daunting, understanding the potential causes and solutions ensures you’re always aware of the possible causes and solutions.
Regular maintenance, timely checks, and addressing issues promptly can ensure your Honda CR-V remains reliable. Remember, these lights are there for a reason – to keep you informed and safe.
Embrace them, understand them, and act accordingly.

Luna Meschiari is a full-blooded car nut who is well known to local garages, as each article is meticulously researched and peppered with the latest piece of information. Guess what car she’s driving right now? A RAV4 2021 Hybrid. But her heart also sleeps for pickups like the F-150. Get to know Luna better on the about us page.
Advertising links are marked with *. We receive a small commission on sales, nothing changes for you.